
Measuring DX Evaporator Coils For Fit: In the field with Chris Wright
Step-by-step instruction, including key visual tips to guide you through the process of measuring a DX Evaporator coil for that perfect fit.
In a recent post, we went over how to accurately measure a DX Evaporator Coil for price. Let’s assume you’ve priced that replacement coil right and you’ve been awarded the job. Congrats! Now, it’s time to be a true finisher.
This is where the casing depth, headers, distributor locations and return connection locations all become critical measurements to ensure a perfect fit with easy installation.
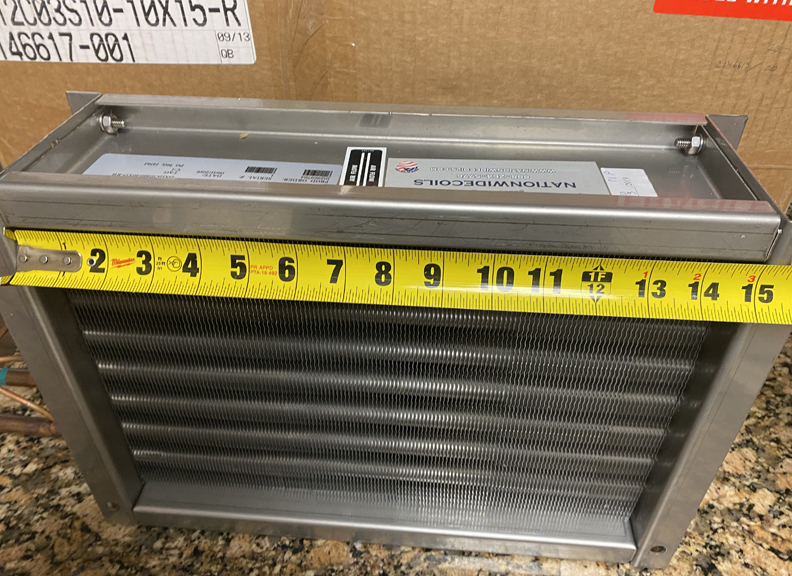
The casing depth is key, as the coil casing often utilizes the entire depth of the coil section, where mounting doesn’t always allow any larger or smaller of a casing depth. From above or at the end of the coil, measure from outside to outside of the casing (that’s the distance from the entering-air side to the leaving-air side of the casing).
Measure the casing depth
I also make it a point to determine how much total depth space is available inside the coil section, just to have this measurement for peace of mind. This can be useful when the customer decides to increase or decrease their capacity and more or less rows can be used.
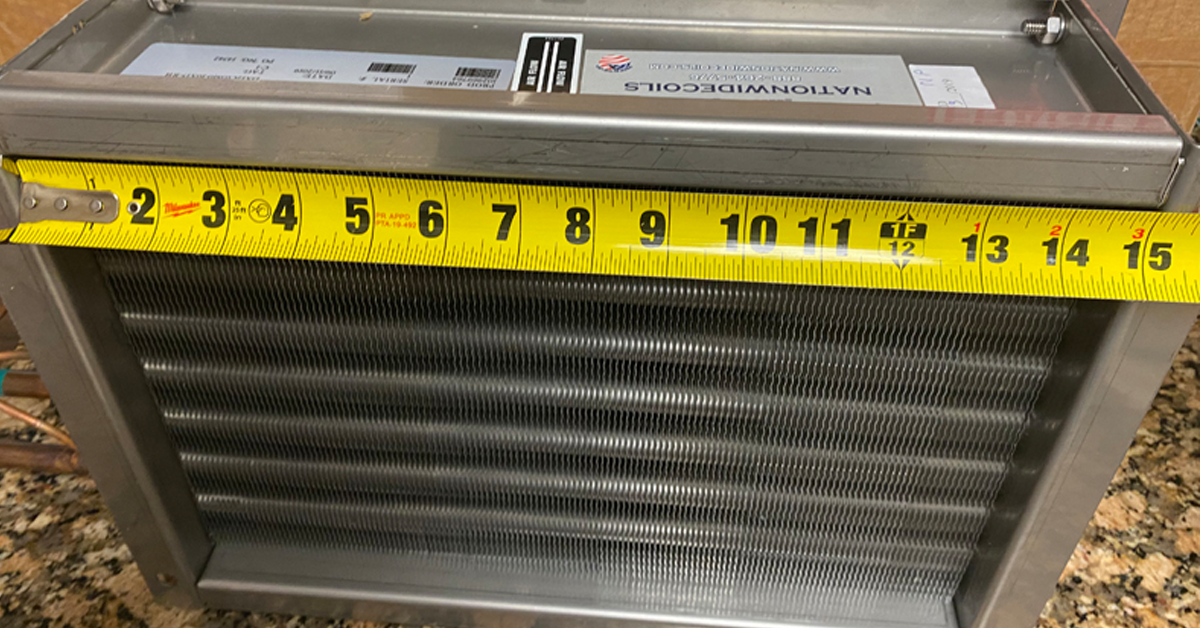
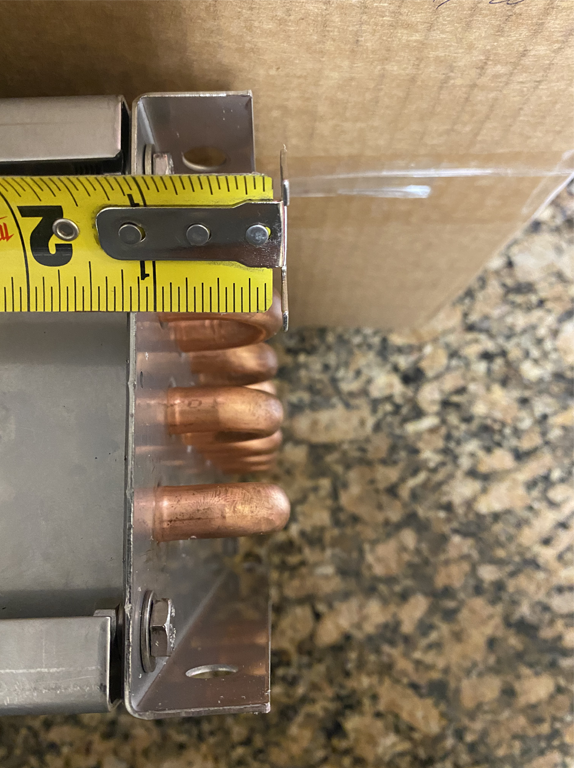
Also important is the casing height. I verify this two ways — by extending my tape measure from the top edge of the top flange to the bottom edge of the bottom flange and by adding each flange height to the finned height. Something seem off? Make sure that the flanges are standard stacking flanges, as in the picture above, and not inverted, knife-edged, semi-inverted, etc., as these can cause some confusion and uncertainty at first. If the flanges aren’t standard, note the total height as this is most important and flanges can be shortened.
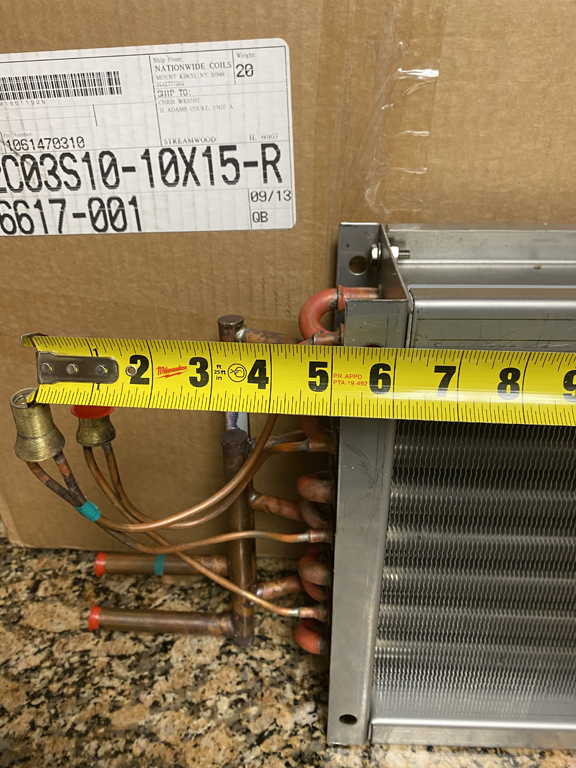
Now measure the casing length, recording the distance from the edge of the vertical flange closest to your supply and return connections, to the edge of the opposite end’s flange that covers the coil’s copper U-bends.
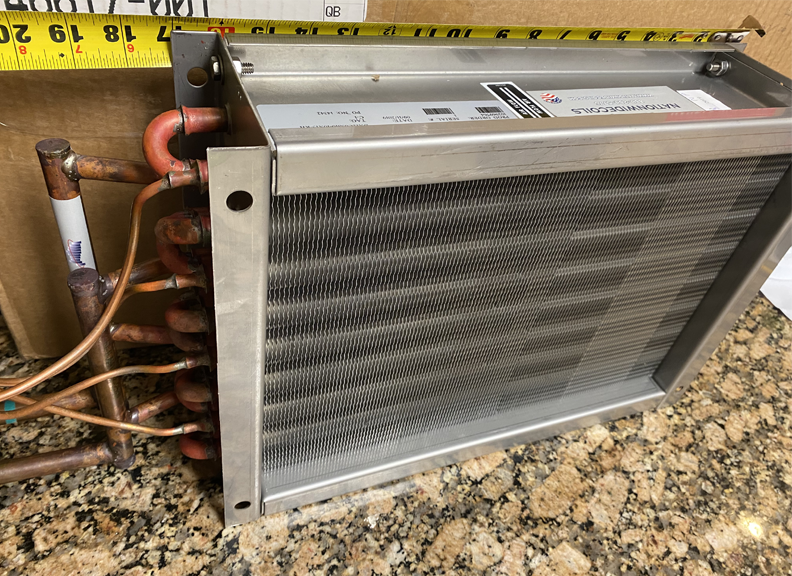
Measure the casing length
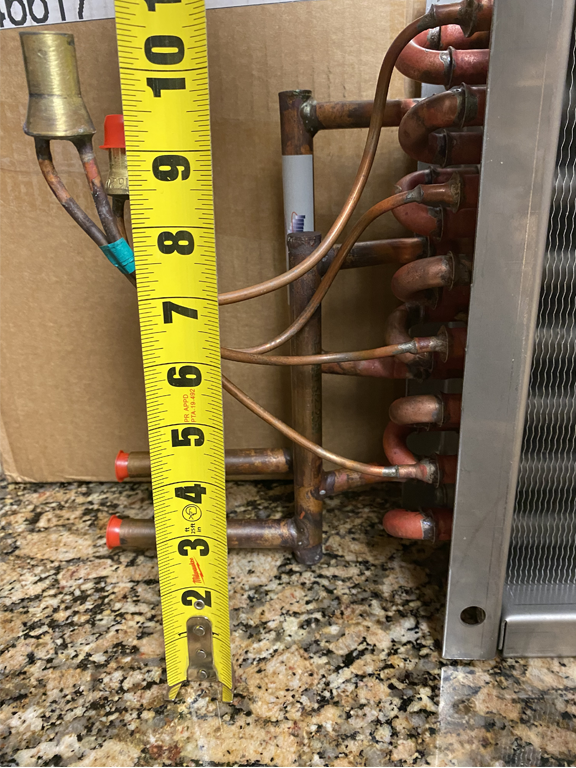
Just as important as the casing length is the OAL (overall length). There are 3 measurements you’ll take to verify your OAL.
1. Measure the C dimension: the distance from the end of the fin pack to the end of the return header.
2. Measure the fin length: measure at top or bottom of the coil near the flanges, not in middle. The tape measure should begin and end inside of the end flanges.
3. Now, add the fin length to the MAX dimension: that’s the end of fin pack to outside of U-bend at the other end of the coil.
The sum of these represents the overall length of the coil including headers (but not including your return connection, as this can usually stick out of the unit.) This is another point where I’ll measure the total available length of the unit, to ensure my OAL is appropriate and to see what extra room we have, if needed.
As far as circuiting goes, it is all counting. Make sure to get:
• The number of circuits
• The number of feeds on each circuit
• The number of capillary tubes on each circuit. While counting, also get the amount of tubes you can count from top to bottom of one row. This can help you if you run into any issues verifying the finned height.
Although the coils are sometimes re-piped in by the installing contractor, always try to keep your return connection and distributor locations as they are.
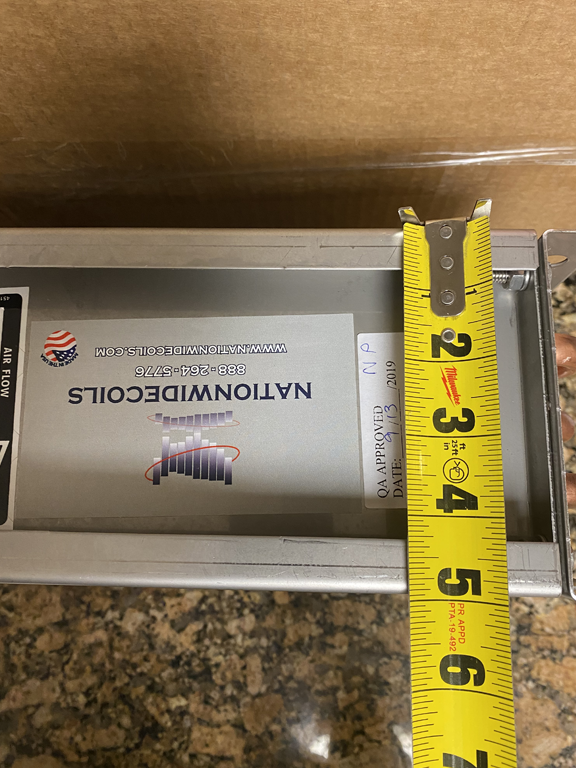
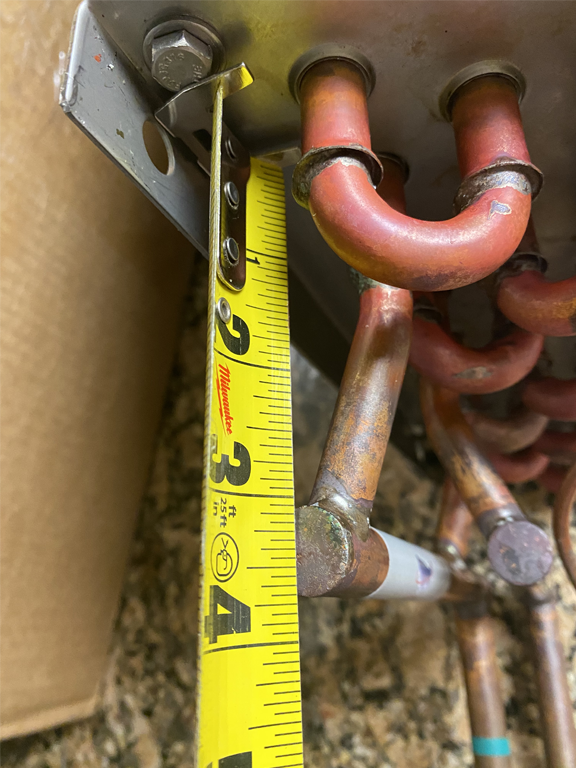
Record the distance from the bottom of the coil’s casing to the center of each connection point:
Record the distance off the connections off either face of the coil:
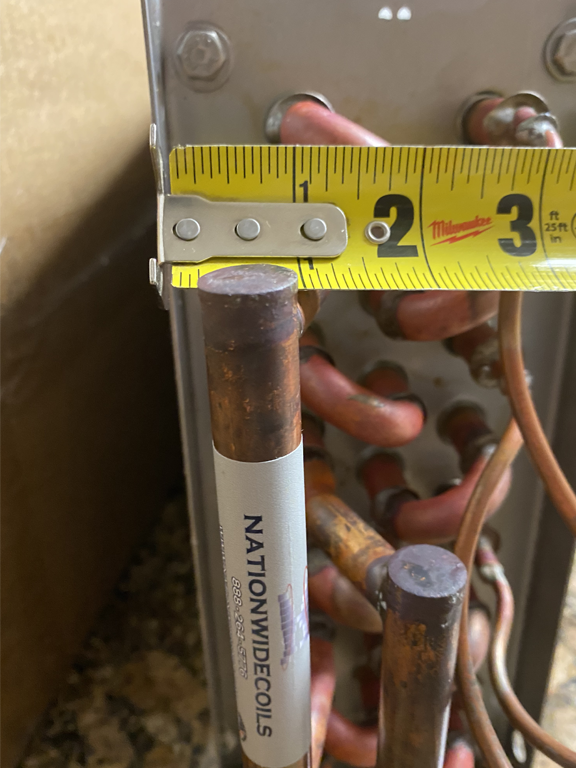
And the record the distance in or out from the end of the fin pack:
The connection locations measured on, say, a dual-circuited DX coil can be backed up/verified by taking the center-to-center distance of the two connections. Also measure the diameter of the sweat return connection.
Once all the construction details have been verified, the performance and construction of the coil should line up beautifully with what is called for. In some cases, fins per inch or the number of feeds or circuits will be adjusted to manipulate capacity without changing construction. At this point, it becomes a matter of determining what works best for the customer’s needs.
If this all seems like a lot of measuring that should be handled by an expert, that’s because it is! Drop me a line, and Nationwide Coils will easily and accurately get those coil dimensions for you. chris@nationwidecoils.com